HelloWorldKeyboard
Hello World Keyboard
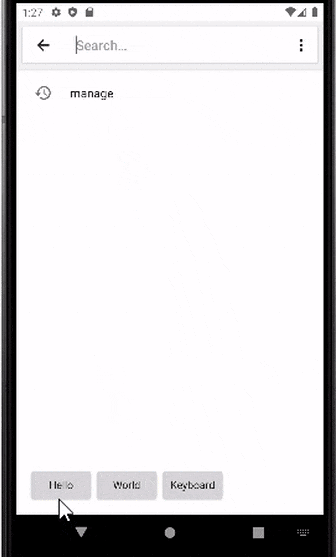
Welcome to the Hello World Keyboard project! This custom Android keyboard is a perfect starting point for first-time Android developers interested in exploring custom keyboard development. The keyboard features three simple buttons that input “hello”, “world”, and “keyboard”.
Getting Started
These instructions will guide you through forking the project, making it your own, and setting up a development environment for testing and further development.
Learn with ChatGPT
Use this custom GPT trained on this repo to learn more about the project and how to make your own keyboard!
![]() Chat with HelloWorldKeyboard GPT
Chat with HelloWorldKeyboard GPT
Prerequisites
Before you start, ensure you have Android Studio installed, the official IDE for Android app development:
Setting Up Your Project from a Public Template
- Create Your Own Copy of the Repository:
- Navigate to the HelloWorldKeyboard project at
https://github.com/modularizer/helloworldkeyboard. - Locate the
Use this templatebutton near the top of the page and click on it to generate a new repository in your GitHub account using HelloWorldKeyboard as a template.
- Navigate to the HelloWorldKeyboard project at
- Set Up Your New Repository:
- Go to your GitHub profile to find the newly created repository.
- Open this repository, and click on
Codeto reveal the clone options. - Copy the provided URL for cloning.
- Import the Project into Android Studio:
- Launch Android Studio.
- Select
File>New>Project from Version Control. - In the dialog box, enter the URL of your newly created repository in the URL field.
- Choose a local directory where you want the project to be saved and click
Clone.
Running and Testing the Project in Android Studio for Beginners
- Setting Up an Emulator for Testing:
- Open Android Studio and navigate to
Tools>Device Manager. - Click on
Create Deviceto set up a new Android Virtual Device (AVD). - Select a device definition that resembles a common phone (e.g., Pixel 4) and choose a system image (preferably the latest available version of Android).
- Follow the prompts to create the emulator. Once created, it will appear in your list of available devices.
- Open Android Studio and navigate to
-
Configuring to Run the HelloWorldKeyboard Service: In Android Studio, go to
Run>Edit Configurations...and set theLaunch OptionstoNothingand theLaunchdropdown toNothing. This is because unlike other apps, there is no “app” to launch for a keyboard, it is simply enabled in the system settings and activated when a text field is selected. - Enabling and Testing the HelloWorldKeyboard:
- Start your emulator by selecting it in the AVD Manager and clicking on the green play button.
- NOTE: Because it is a service, no app will be launched when you run the project. Instead, the keyboard will be enabled in the system settings.
- Once the emulator is running, open the
Settingsapp (you can find it by swiping up on the home screen and searching for ‘Settings’). - Navigate to
System>Languages & input>On-screen keyboard>Manage on-screen keyboards. - Toggle on the
Hello World Keyboard. - To test, open any app that allows you to type text. Click on a text field to bring up the keyboard.
- If the default keyboard appears, switch to the HelloWorldKeyboard by tapping on the keyboard icon in the navigation bar and selecting ‘Hello World Keyboard’.
- Start your emulator by selecting it in the AVD Manager and clicking on the green play button.
Note: It’s helpful to keep the README open as you go through these steps. If you encounter any difficulties, refer back to the detailed instructions provided.

Customizing Your Keyboard
Key Files for Customization
app/src/main/java/com.example.helloworldkeyboard/KeyboardService.kt: Main service for keyboard logic.app/src/main/res/keyboard_layout.xml: Layout file for the keyboard UI.app/src/main/res/values/strings.xml: Strings file for keyboard UI text.app/src/main/AndroidManifest.xml: App declarations and configurations.
Tips for Designing Your Keyboard
- Layout: Modify
keyboard_layout.xmlfor UI changes. - Functionality: Adapt
KeyboardService.ktfor different key actions. - Testing: Always test changes on an emulator or device.
Contributing
This project is open to contributions with the goal of making an absolute bare-bones keyboard for first-time Android developers, encouraging best practices and good coding habits while also providing a starting point for further development. Feel free to fork this repository, make your changes, and submit pull requests to contribute to this project.
License
This project is 100% open source and free to use for any purpose. This project is licensed under the Unlicense - see the LICENSE file for details.